What is Dulce de leche?
Directly translated as “sweet from milk,” this delicious confection is made by caramelizing milk and sugar. Although the ingredients for dulce de leche are simple, achieving this rich and spreadable caramel can be tricky to get exactly right. With dulce de leche as a main component in our upcoming baking box featuring Alfajor cookies, Bake Eat Love stepped into the test kitchen to find the easiest, safest, and least messy method to make this irresistible caramel.
A brief history
There has been a lot of contention between Argentina and Uruguay over who invented dulce de leche, and the story often has variations depending on who is telling it. Legend has it that an Argentine cook was preparing Lechada (a milk drink sweetened with sugar) for Juan Manuel de Rosa, a political leader. She stepped away and lost track of time and returned to a pot that contained a thick and creamy caramel (Fajardo, 2017). That’s right, this Argentian staple was a happy accident!
Ingredients
Sweetened condensed milk is most commonly used to make dulce de leche. When heat is added the milk and sugar in sweetened condensed milk thicken and caramelize and create a rich and creamy dulce de leche.
The methods
1.) Microwave
2.) Stove top
3.) Oven
The microwave method
The Process:
Step 1: Pour 7 ounces (half a can) of sweetened condensed milk into a large (2 cup) heat proof bowl and cover it with plastic wrap, making sure to leave a small portion uncovered to allow steam to escape.
Step 2: We attempted to microwave the sweetened condensed milk for 1 minute. After only 30 seconds of microwaving, the milk had boiled up and out of the bowl where it was left slightly uncovered. We removed the bowl, whisked the milk, cleaned up the spilled milk in the microwave, and returned the partially covered bowl to the microwave.
Step 3: Microwaved for 20 seconds. The milk boiled up again, but this time thankfully not over the top of the bowl. We removed the bowl again from the microwave, whisked it, covered it and microwaved it for a third time for 30 seconds. The milk again boiled up and out of the bowl.
Step 4: Transfered milk to a larger (4 cup bowl). Microwaved for 30 seconds. The milk boiled over!
Step 5: We scraped the condensed milk into a 3.7 liter (15.7 cups) bowl, covered it with plastic wrap and then microwaved for 1 minute. The milk did not boil out, but we discovered after removing it from the microwave that it had burned in the center.
The Results:
We did not have success with the microwave method. We found it to be labor intensive, messy and it did not result in a good dulce de leche product.
The stove top method
The process:
- Wash the can and remove the label and adhesive.
- Open the can so it is cracked open at about a 30 degree angle.
- Put a washcloth in a saucepan. This will keep the can from moving around and making noise while it is cooking.
- Fill the saucepan with enough water that it will go 3/4 the way up the can. You do not want to add any water inside the can.
- Place the can inside the saucepan and bring the water to a simmer. Cook for 2-3 hours.
- Water will evaporate during this time. Be sure to refill it every 20 minutes to keep it around 3/4 of the way up the can.
- While cooking, the white sweetened condensed milk will turn into a caramel dulce de leche! The longer it cooks, the darker it will become. Be sure to stir the caramel with a spoon. The color will be darker on the bottom, stirring will allow you to see the full color change.
- When the dulce de leche is cooked to your liking, use an oven mitt or a pair of tongs to remove the can and allow it to come to room temperature.
The Results:
We did not love this method. We found it to be very hot to keep the stove on for an extended period of time.
The oven method
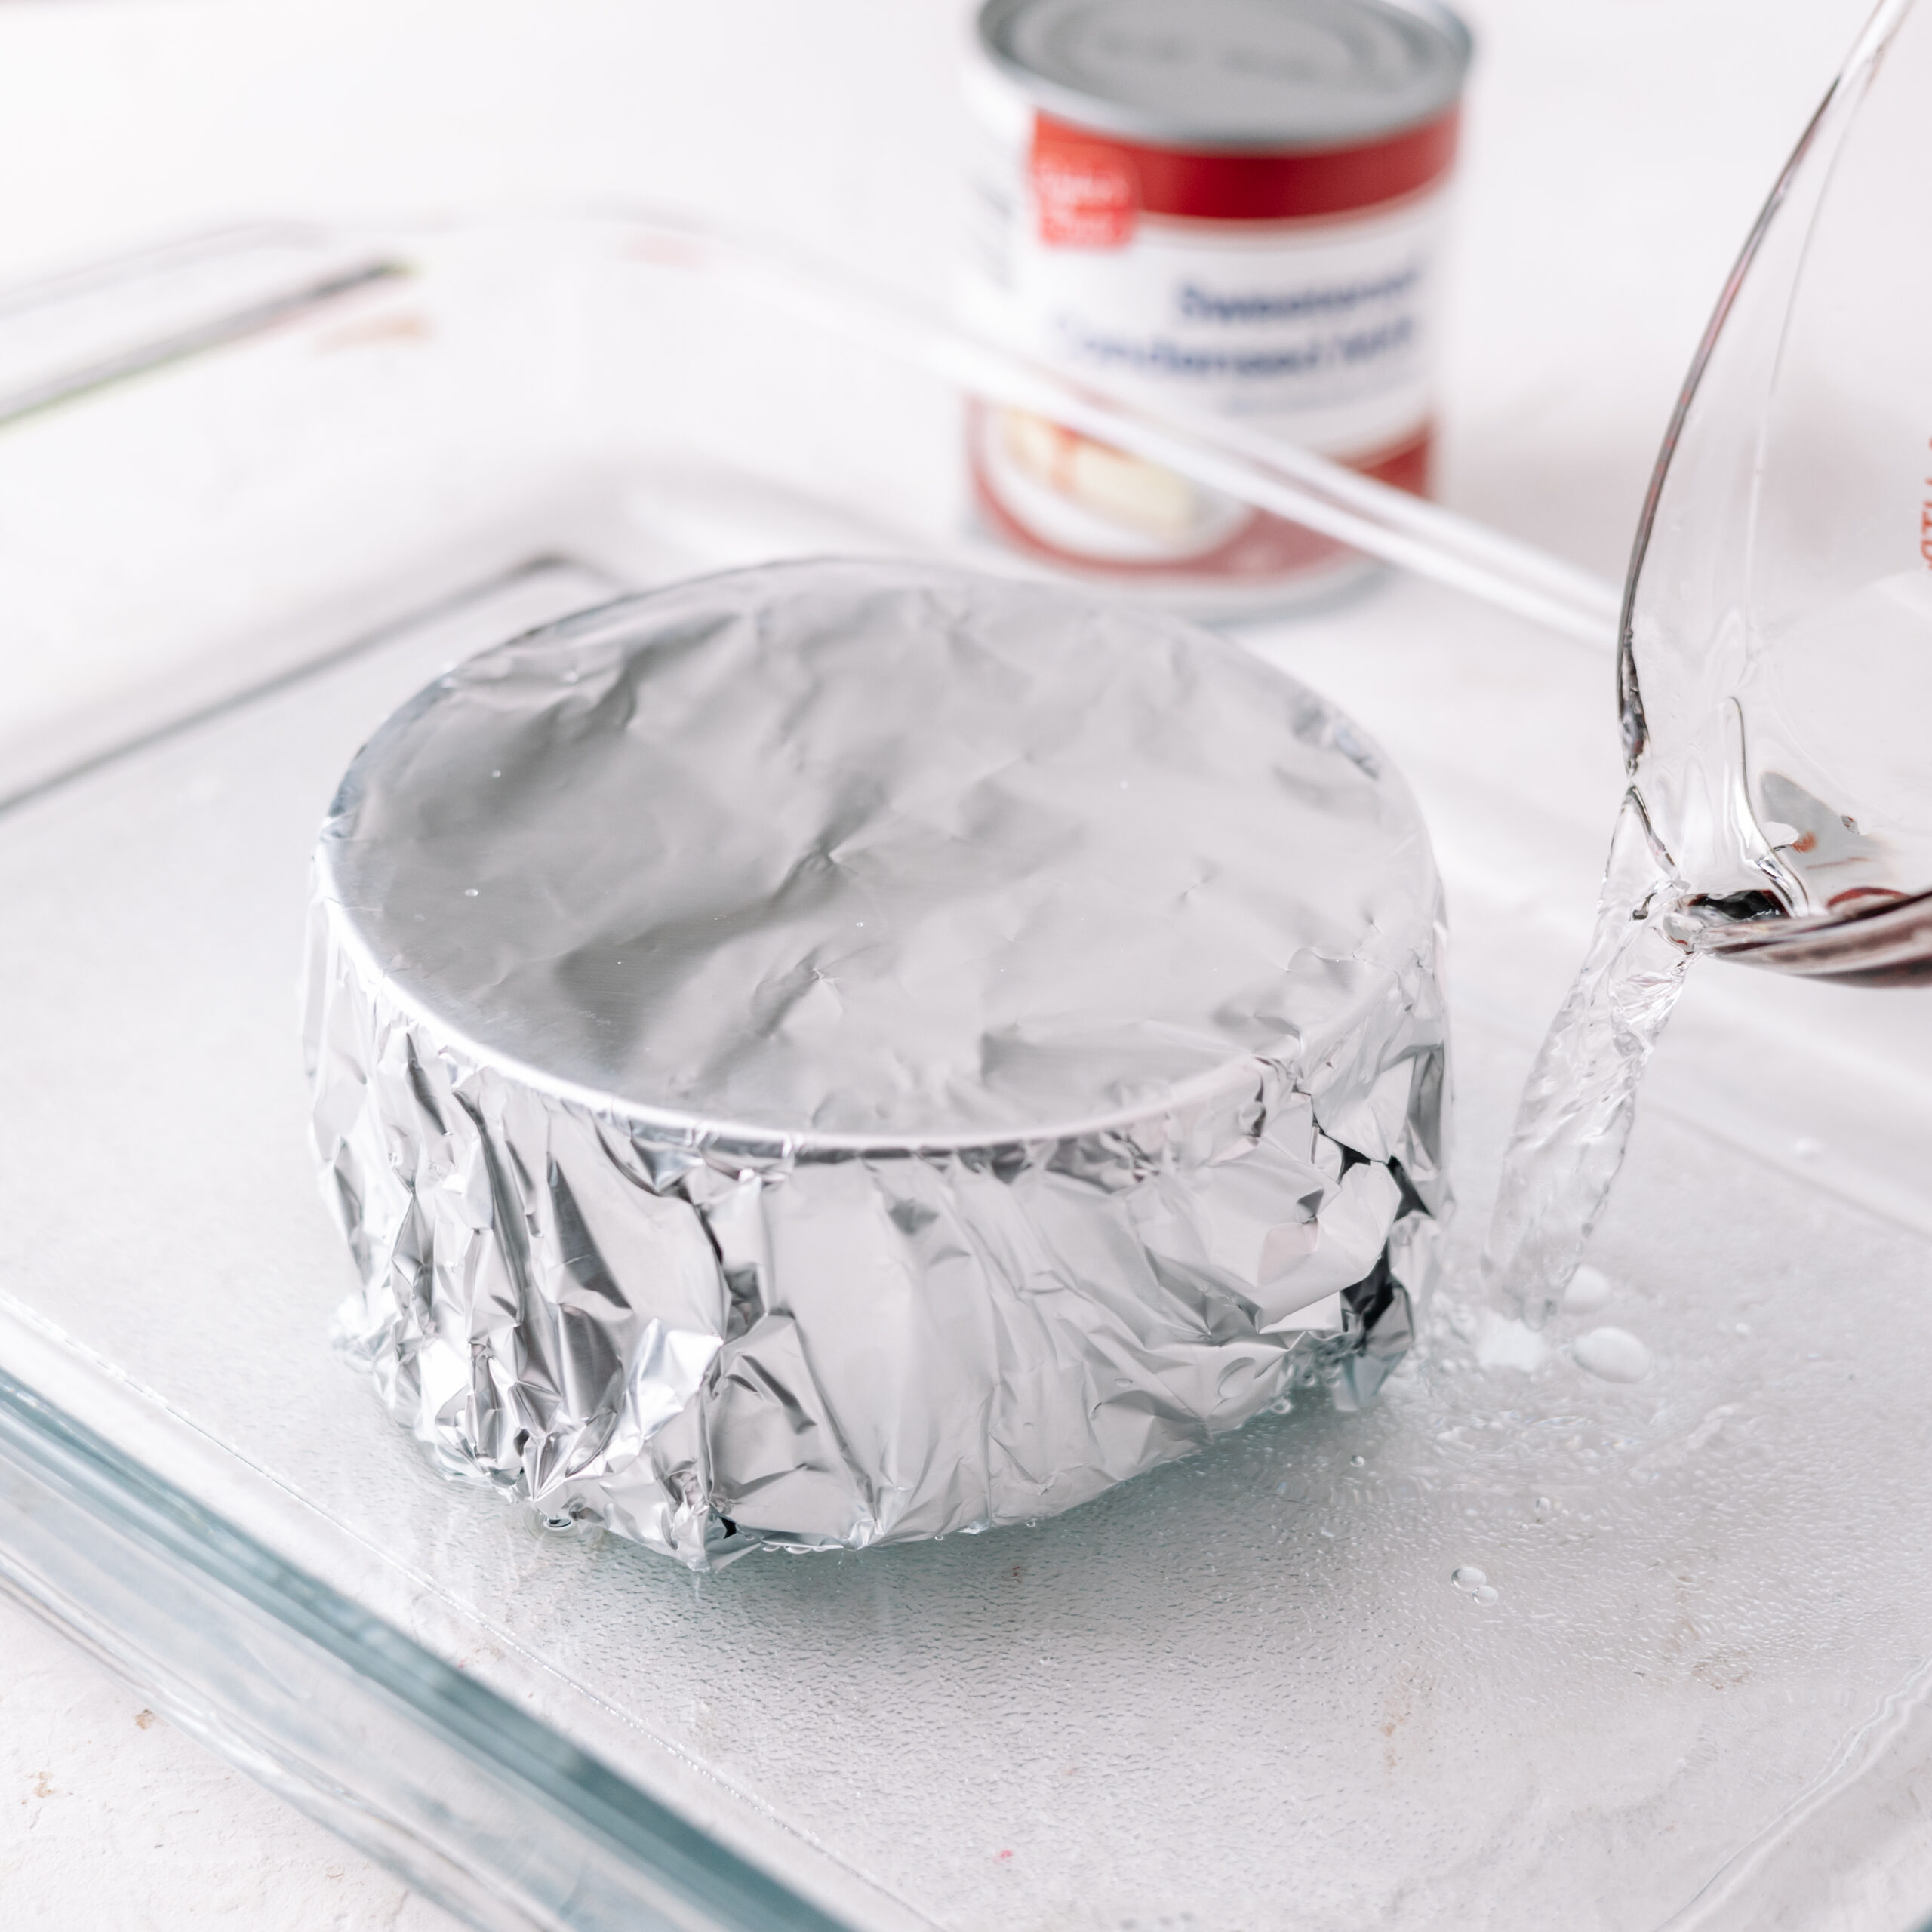
Step 1: Preheat oven to 425°F. Pour 7 oz (half of a can) sweetened condensed milk into a 4-cup ovenproof dish and cover with aluminum foil.
Step 2: Place the dish in a 13 x 9 casserole dish, transfer to the oven when preheated.
Step 3: Pour hot water in 13 x 9 dish until it reaches halfway up the sides of the ovenproof dish. Bake for 1-1 ½ hours (depending on your oven and if you like a darker dulce de leche the baking time could be up to 2 hours), whisking every 45 minutes, until it is a rich caramel color.
Check every 25 minutes and add more hot water as needed. We discovered if more water is not added during the baking process and all of the water evaporates; the condensed milk will burn. Remove from the oven, whisk until smooth, let cool.
Results: The oven method was our favorite for making dulce de leche
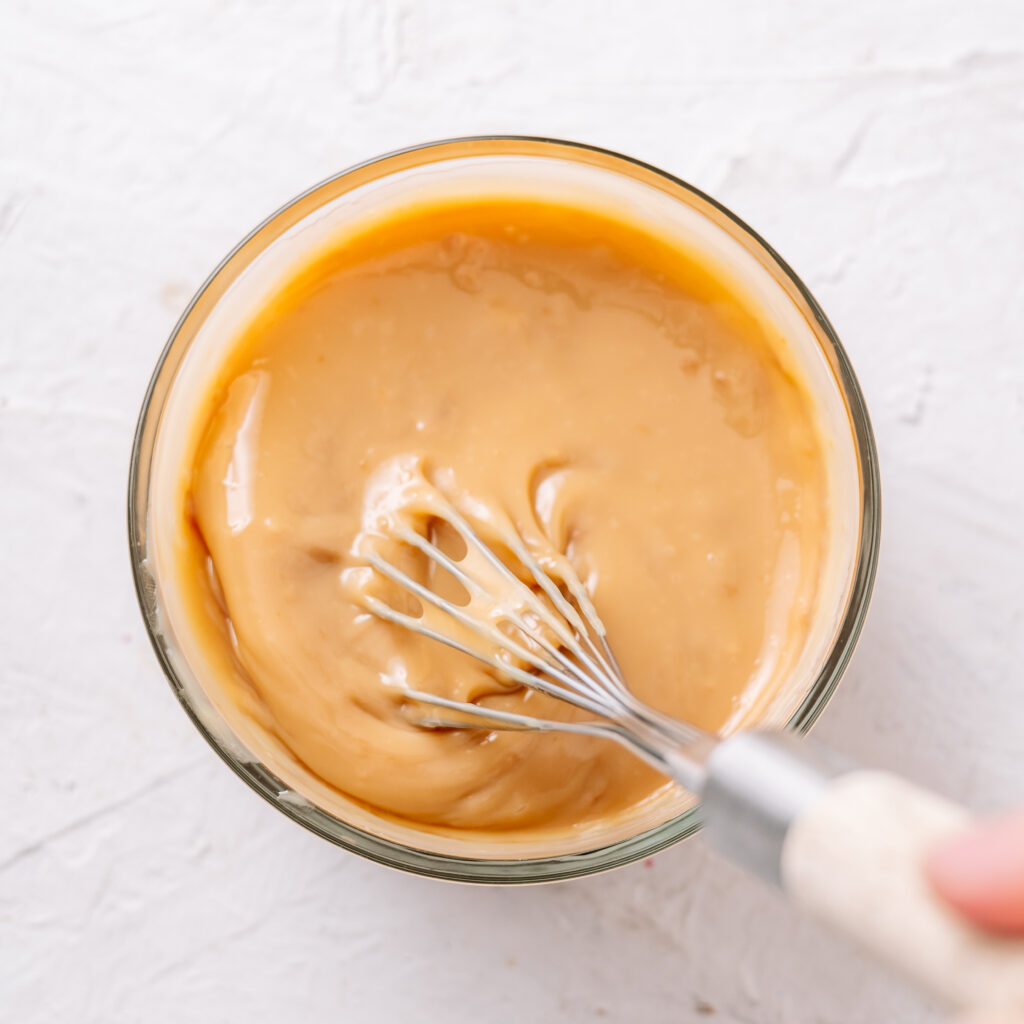
While this method does have a long baking time, we found that it was the easiest and most hands-off preparation. We only needed to add more water once to the casserole dish and found that the water bath allowed the milk and sugar to caramelize slowly resulting in a nice rich dulce de leche that was sweet, flavorful and without any bitter undertones.
Sources: Fajardo, M. (2017, September 24). A brief history of dulce de leche. Culture Trip. https://theculturetrip.com/south-america/uruguay/articles/a-brief-history-of-dulce-de-leche/