Rolled cakes are a showstopper and make a wonderful addition to a holiday table. However, they can seem intimidating to make. Bakers who have not attempted them before worry about having the right cake texture and, of course, about the dreaded cracking that can happen when rolling the cake. We are here to set you up for success on your cake roll adventure. It starts with a good recipe and a step-by-step guide on the right technique.
A brief history
Jelly cake rolls, also known as Swiss rolls, became popular in the United States in the 1800s. They are traditionally a thin sheet of sponge cake, filled with jam, jelly, or whipped cream, and then rolled and sliced. The rolled cake is dusted with powdered sugar or piped whipped cream. When the cake is sliced the alluring pin wheel design is displayed.
The Cake
A jelly roll cake structure should be tender, fluffy, and flexible, but how do you achieve this perfect trifecta? Unlike a layer cake, for a roll cake you want to have a lower fat content. The lower fat content in the cake allows the gluten structures in the flour to develop and for the cake to rise. This gluten development makes the cake more pliable. The key to having a tender and fluffy cake is whipping the eggs. Rather than whipping egg whites and folding them in to create a lighter fluffy batter, the eggs are whipped whole for at least five minutes until they are nice and fluffy. The yolk and the white are left together so that the fat content in the yolk does not allow the whites to become over whipped. The eggs will continue to expand during baking and help the cake achieve a nice rise.
Rolling the cake
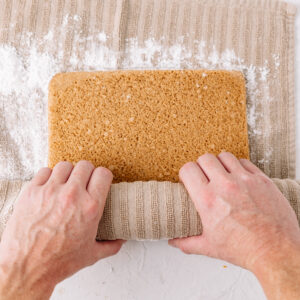
There are several methods for rolling a jelly roll. However, we have found that the best method starts with prepping your baking pan. Line your jelly roll pan (10×15 or 9×13) with aluminum foil and spray generously with cooking spray. Because the cake batter does not contain a lot of fat, without the addition of the cooking spray the cake will stick to the aluminum foil. After the cake is baked, remove it from the oven and allow it to cool for 5-7 minutes. Lay a clean kitchen towel on your countertop and dust with powdered sugar. Using a hot pad, carefully flip your warm cake onto the kitchen towel. Carefully remove the aluminum foil from the top of the cake. Starting at the narrow end, roll the towel and cake together (the towel will be rolled inside of your cake). Keep the cake rolled and allow it to cool completely for at least 2 hours. It is important to roll your cake while it is still warm, because this trains your cake into a rolled shape and will prevent cracks when the cake is filled and rolled again later.
Filling the Cake
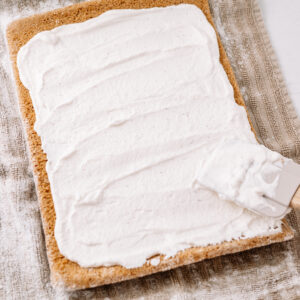
When filling the cake, it is important to leave a 1/2-inch border around the edges of the unrolled cake. This helps prevent the filling from coming out the ends of the cake as it is re-rolled.
Re-rolling the filled cake
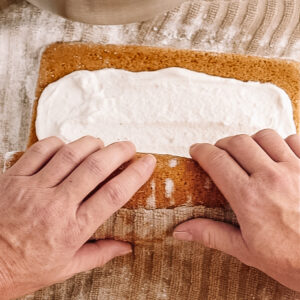
After the filling has been spread evenly on the cake, the cake is then re-rolled, and the towel is peeled away during the process. Make sure to gently tuck the roll in with your fingers as you are rolling. This helps develop a good swirl and helps keep the roll even.
Finishing the roll cake
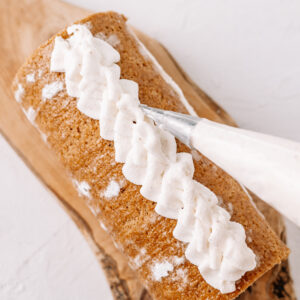
Carefully place the cake onto a cutting board. If you notice that your filling does not go to the edge of each of your cake ends, take a sharp knife and cut off about 1 inch from each end of the cake showing off the beautiful spiral you created. The cake can then be dusted with more powdered sugar or some of the reserved filling can be piped on decoratively.
Want to make our Gingerbread Cake Roll with Eggnog Whipped cream filling? Check out the recipe.
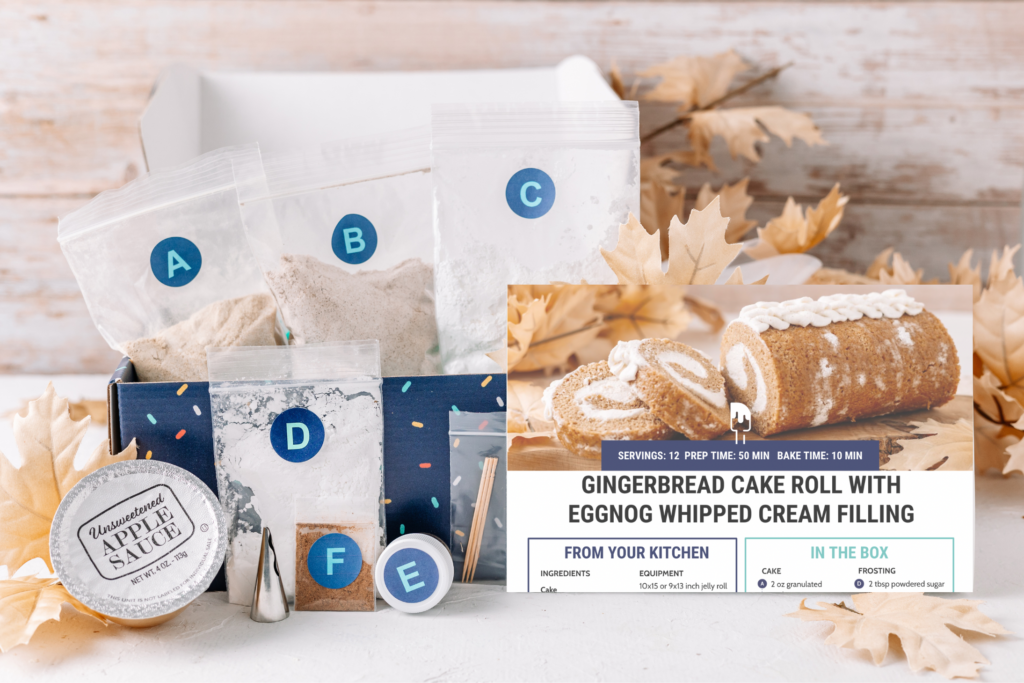
Want to make one of our recipes, but prefer to skip the ingredient shopping and measuring? Check out bakeeatlovebox.com – we ship pre-measured baking kits to your doorstep.
Sources
Sharon Tyler Herbst. (1995). Food Lover’s companion (2nd ed.). Barron’s educational series.